How to Lay Artificial Grass: Beginner’s Step-by-Step Guide
- 2023-12-19
Had enough of weekend lawn duties? Artificial grass could be your weekend savior! Artificial turf installation might seem a bit tricky, our advice is to let the pros handle it. But if you’re wondering, “How to lay artificial grass?”—don’t worry! We’ve got the perfect guide for you.
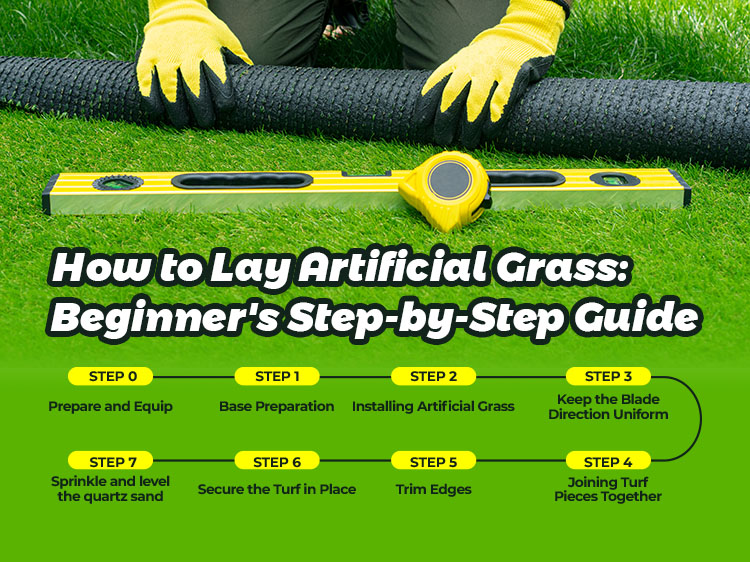
Table of Contents
Toggle- Step 0: Prepare and Equip
- Step1: Base Preparation
- Step2: Installing Artificial Grass
- Step3: Keep the Blade Direction Uniform
- Step 4: Joining Turf Pieces Together
- Step 5: Trim Edges
- Step 6: Secure the Turf in Place
- Step 7: Sprinkle and Level the Quartz Sand
- How to Maintain Artificial Grass: Tips for a Great Look
- Conclusion
Step 0: Prepare and Equip
Size up & select your turf
Measure the longest length and width of your designated area, and roughly calculate the number of rolls needed to avoid excess. Artificial grass rolls typically come in 2m and 4m widths, with lengths up to 25m. For the lowdown on the hottest turf trends, check out our “Best Artificial Grass 2023” guide to find your perfect match.
Tools required for artificial grass installation
The tools required for preparing to lay an artificial lawn depend on the type and size of your installation. There are essential tools that are a must, and optional ones that you can choose based on your specific needs.
Tape measure
Gloves
Carpet Knife
Spade or shovel
Hammer
U-shaped nails
Quartz sand
Sub-base material
Adhesive jointing tape
Stiff outdoor broom or motorised power brush
Roller or vibrating plate for compacting (both can be hired)
Geotextile membrane: Optional but highly recommended for soil surfaces
Shock pad: Optional, particularly advised for hard surfaces

Step1: Base Preparation
Artificial grass is versatile and excels on flat, compacted, and well-draining surfaces. Your area’s surface dictates the need for a base layer drainage system or a ready-to-lay installation. Here, we focus on the preparation of soil and concrete surfaces.
For soil surfaces: sand and stone base
a. Remove the existing grass
Efficiently remove existing grass by cutting small squares with a spade’s edge and lifting them, minimizing root remnants. Rake everything up and set it aside or place it in your wheelbarrow for disposal or recycling.
b. Excavate, level and compact
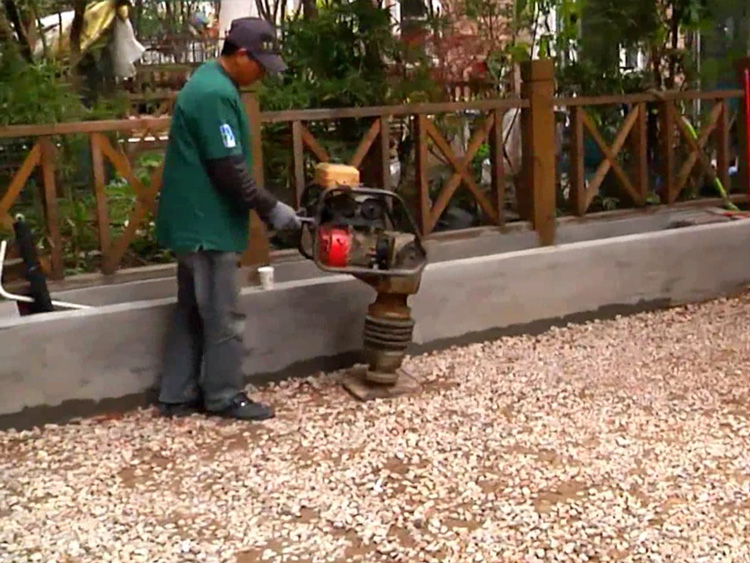
Following the removal of existing grass, excavate the area to a desired sub-base depth of about 2-3 inches. Utilize a vibrating-plate compactor to thoroughly level and compact the soil.
c. Install the sub-base
For the sub-base, evenly spread finely crushed rock, opting for materials like gravel, crushed stone, or decomposed granite, each smaller than 3/8 inches. Employ a rake to even out the base as much as possible, and then follow up with 1/2 to one inch of compacted sand for a smooth, level surface. Compact the entire base using a roller or vibrating plate to create a strong and even foundation.
d. Laying a geotextile membrane
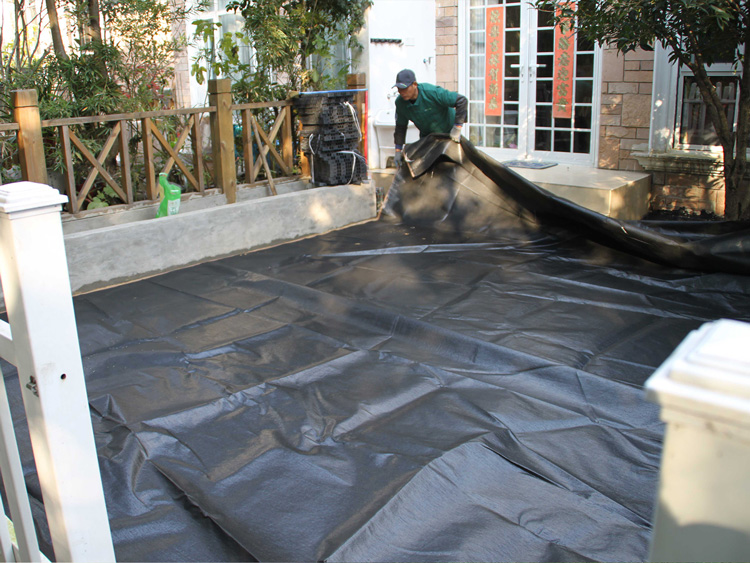
To prevent any unwanted vegetation from growing through the turf, lay out a weed barrier fabric. Cut the fabric to fit the area, and ensure there is a small overlap between each piece.
For concrete surfaces: clean and smooth prep
a. Clean the surface
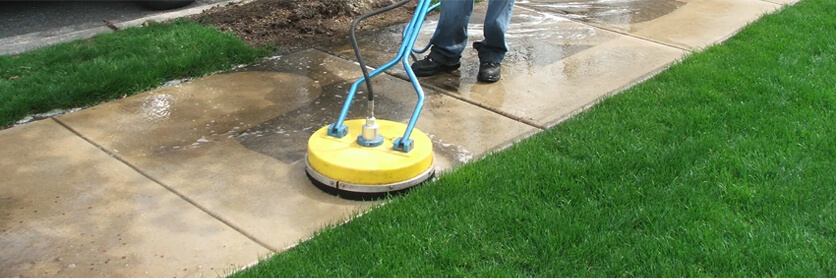
Sweep and wash the concrete surface to eliminate dirt, dust, mold, or residue. Ensure complete drying and dissipation of any cleaning agents before proceeding.
b. Repair cracks
Thoroughly inspect the concrete for any cracks or uneven spots. Fill these imperfections with an appropriate patching material, ensuring a smooth and level surface.
c. Lay shock pads (optional)
While fake grass can be directly laid on concrete, it’s advisable to consider incorporating shock pads in specific applications like play areas or recreational spaces. This enhances safety with cushioning and adds an extra layer of comfort.
Step2: Installing Artificial Grass
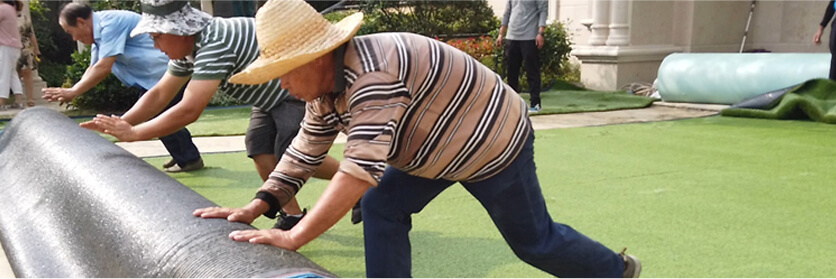
Unroll the artificial grass over the shock pad or weed membrane, making sure it is properly aligned with the area you want to cover.
PRO TIP: The turf is usually stored rolled up, so it’s best to let it sit in the sun for a few hours to acclimate to the temperature and flatten out any wrinkles.
Step3: Keep the Blade Direction Uniform
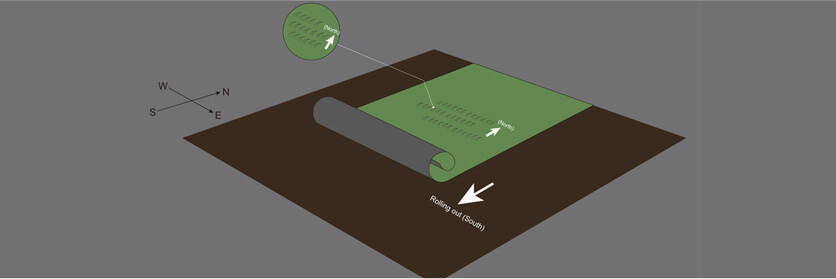
To ensure a natural and appealing look, align the blades of each piece of artificial turf in the same direction when laying multiple pieces side by side to cover a wide area.
PRO TIP: Having the pile direction (the direction in which the blades lean) run toward the house is recommended for optimal aesthetics, especially when viewed from the windows.
Step 4: Joining Turf Pieces Together
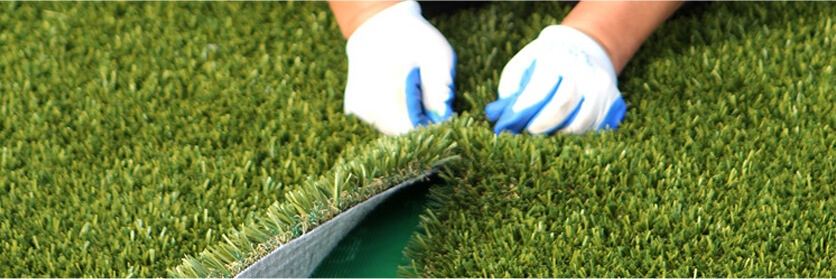
When using more than one roll of artificial turf, you need to seam them together. Use a utility knife to trim the edges of each piece, and align the two pieces edge-to-edge at the seam. Pull back the grass and lay adhesive tape along the length of the seam.
Slowly join the two turf pieces together, starting at one end, making sure the seams match up without any gaps. Carefully walk along the seam a couple of times to tamp down the joint, which will further secure the turf.
Step 5: Trim Edges
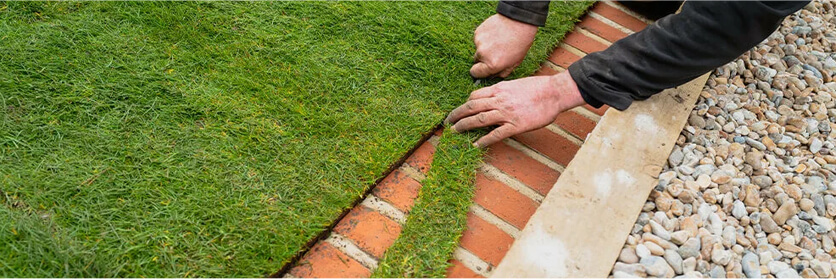
Now that the pieces are neatly joined and positioned, walk around the edges of the turf and trim any sections protruding beyond the desired boundaries.
PRO TIP: Trim from the back, taking care not to cut the grass blades.
Step 6: Secure the Turf in Place
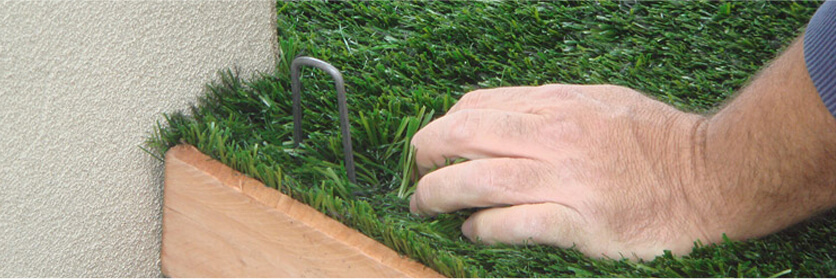
We recommend placing a handful of U-shaped nails along the seams to reinforce these areas. Once the turf is laid, ensure it is stretched tight and leveled. Then, secure the turf perimeter with U-shaped nails, placing them every few inches to ensure its stability.
For concrete surfaces, utilize glue instead of U-shaped nails for securing the turf. Fold back the edges of the grass and apply glue along the entire perimeter. Allow a few hours for proper bonding; refrain from walking on the grass during this time to prevent any shifting.
PRO TIP: Conceal U-shaped nails carefully between blades to secure the turf without burying grass fibers, ensuring a pristine look.
Step 7: Sprinkle and Level the Quartz Sand
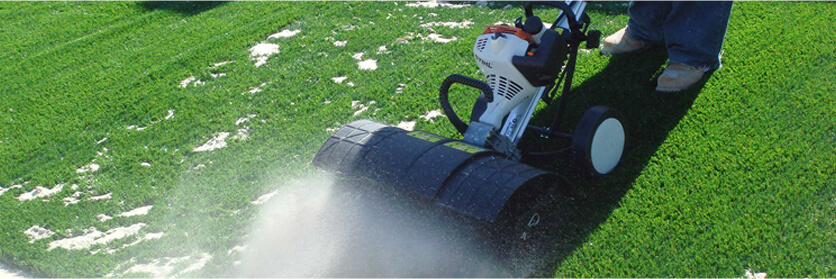
To prevent the artificial grass from being flattened by foot traffic, spread the silica sand evenly over the entire surface. Use a stiff bristle broom or motorised power brush to work the sand deep into the grass fibres, which will help them stand up and give your lawn a natural look. Make sure to brush in the same direction across the grass to maintain a uniform appearance.
How to Maintain Artificial Grass: Tips for a Great Look
Now the artificial turf installation is finished and you can take pleasure in the beauty of your new lawn! With regular care and maintenance, your synthetic turf will keep its vibrant appearance and durability for many years.
- Regularly remove leaves and other debris from your artificial grass using a broom, leaf rake, or leaf blower, especially after storms or windy days.
- Routinely brush your grass with a stiff-bristle broom or specialized turf brush to maintain straight and even fibers, giving it a fluffy appearance.
- Spillages can be washed away with water. For lightly soiled areas, a simple solution of warm water and a small amount of mild detergent will do the trick. Wipe it with a sponge, then rinse.
- Clean pet waste by allowing solid waste to dry, then remove and wash away residue with diluted disinfectant. For urine, wash with water; combat odors by using a solution of equal parts water and vinegar, then rinse thoroughly.
- Avoid sharp objects and distribute the weight of furniture, trampolines, or play equipment to minimize indentations.
- Keep barbecues and hot objects away to protect your grass from damage.
For additional cleaning tips, read our guide on Artificial Turf Cleaning and Maintenance.
Conclusion
Installing artificial grass transforms your outdoor space into a visually pleasing, low-maintenance haven—a great alternative to natural grass with enduring benefits. Whether you’re a hands-on DIY enthusiast or prefer professional installation, taking the time to study and review step-by-step instructions is crucial for achieving a successful artificial turf installation.
For our wholesale and retail partners, this installation guide is a helpful sales tool that embodies our commitment to a successful partnership, rooted in consistent and thorough support. If you have any questions about how to lay artificial grass or would like to learn more about CCGrass, feel free to reach out to us at 86 25 6981 1666 or email us at [email protected].





 Tel:
Tel:  E-mail: